Tracking how users interact with your Shopify store can help you improve the user experience and increase conversion rates.
In this guide, we'll:
- Add PostHog tracking code to your Shopify store
- Add properties to an autocaptured event using data attributes
- Send purchase information to PostHog using a custom event (limited to Shopify Plus stores)
1. Install PostHog in Shopify
Get your PostHog snippet from your 'Project Settings' or the initial PostHog setup
Login to your Shopify dashboard
Go to 'Online Store' -> 'Themes' (see image below)
On your theme, click 'Actions' -> 'Edit code' (see image below)

You should now be seeing a code editor. Click on
theme.liquidunder 'Layout' on the left sidebar (see image below)Navigate until you see the closing
</head>tag. Paste your snippet there, before that tag, like in the image below: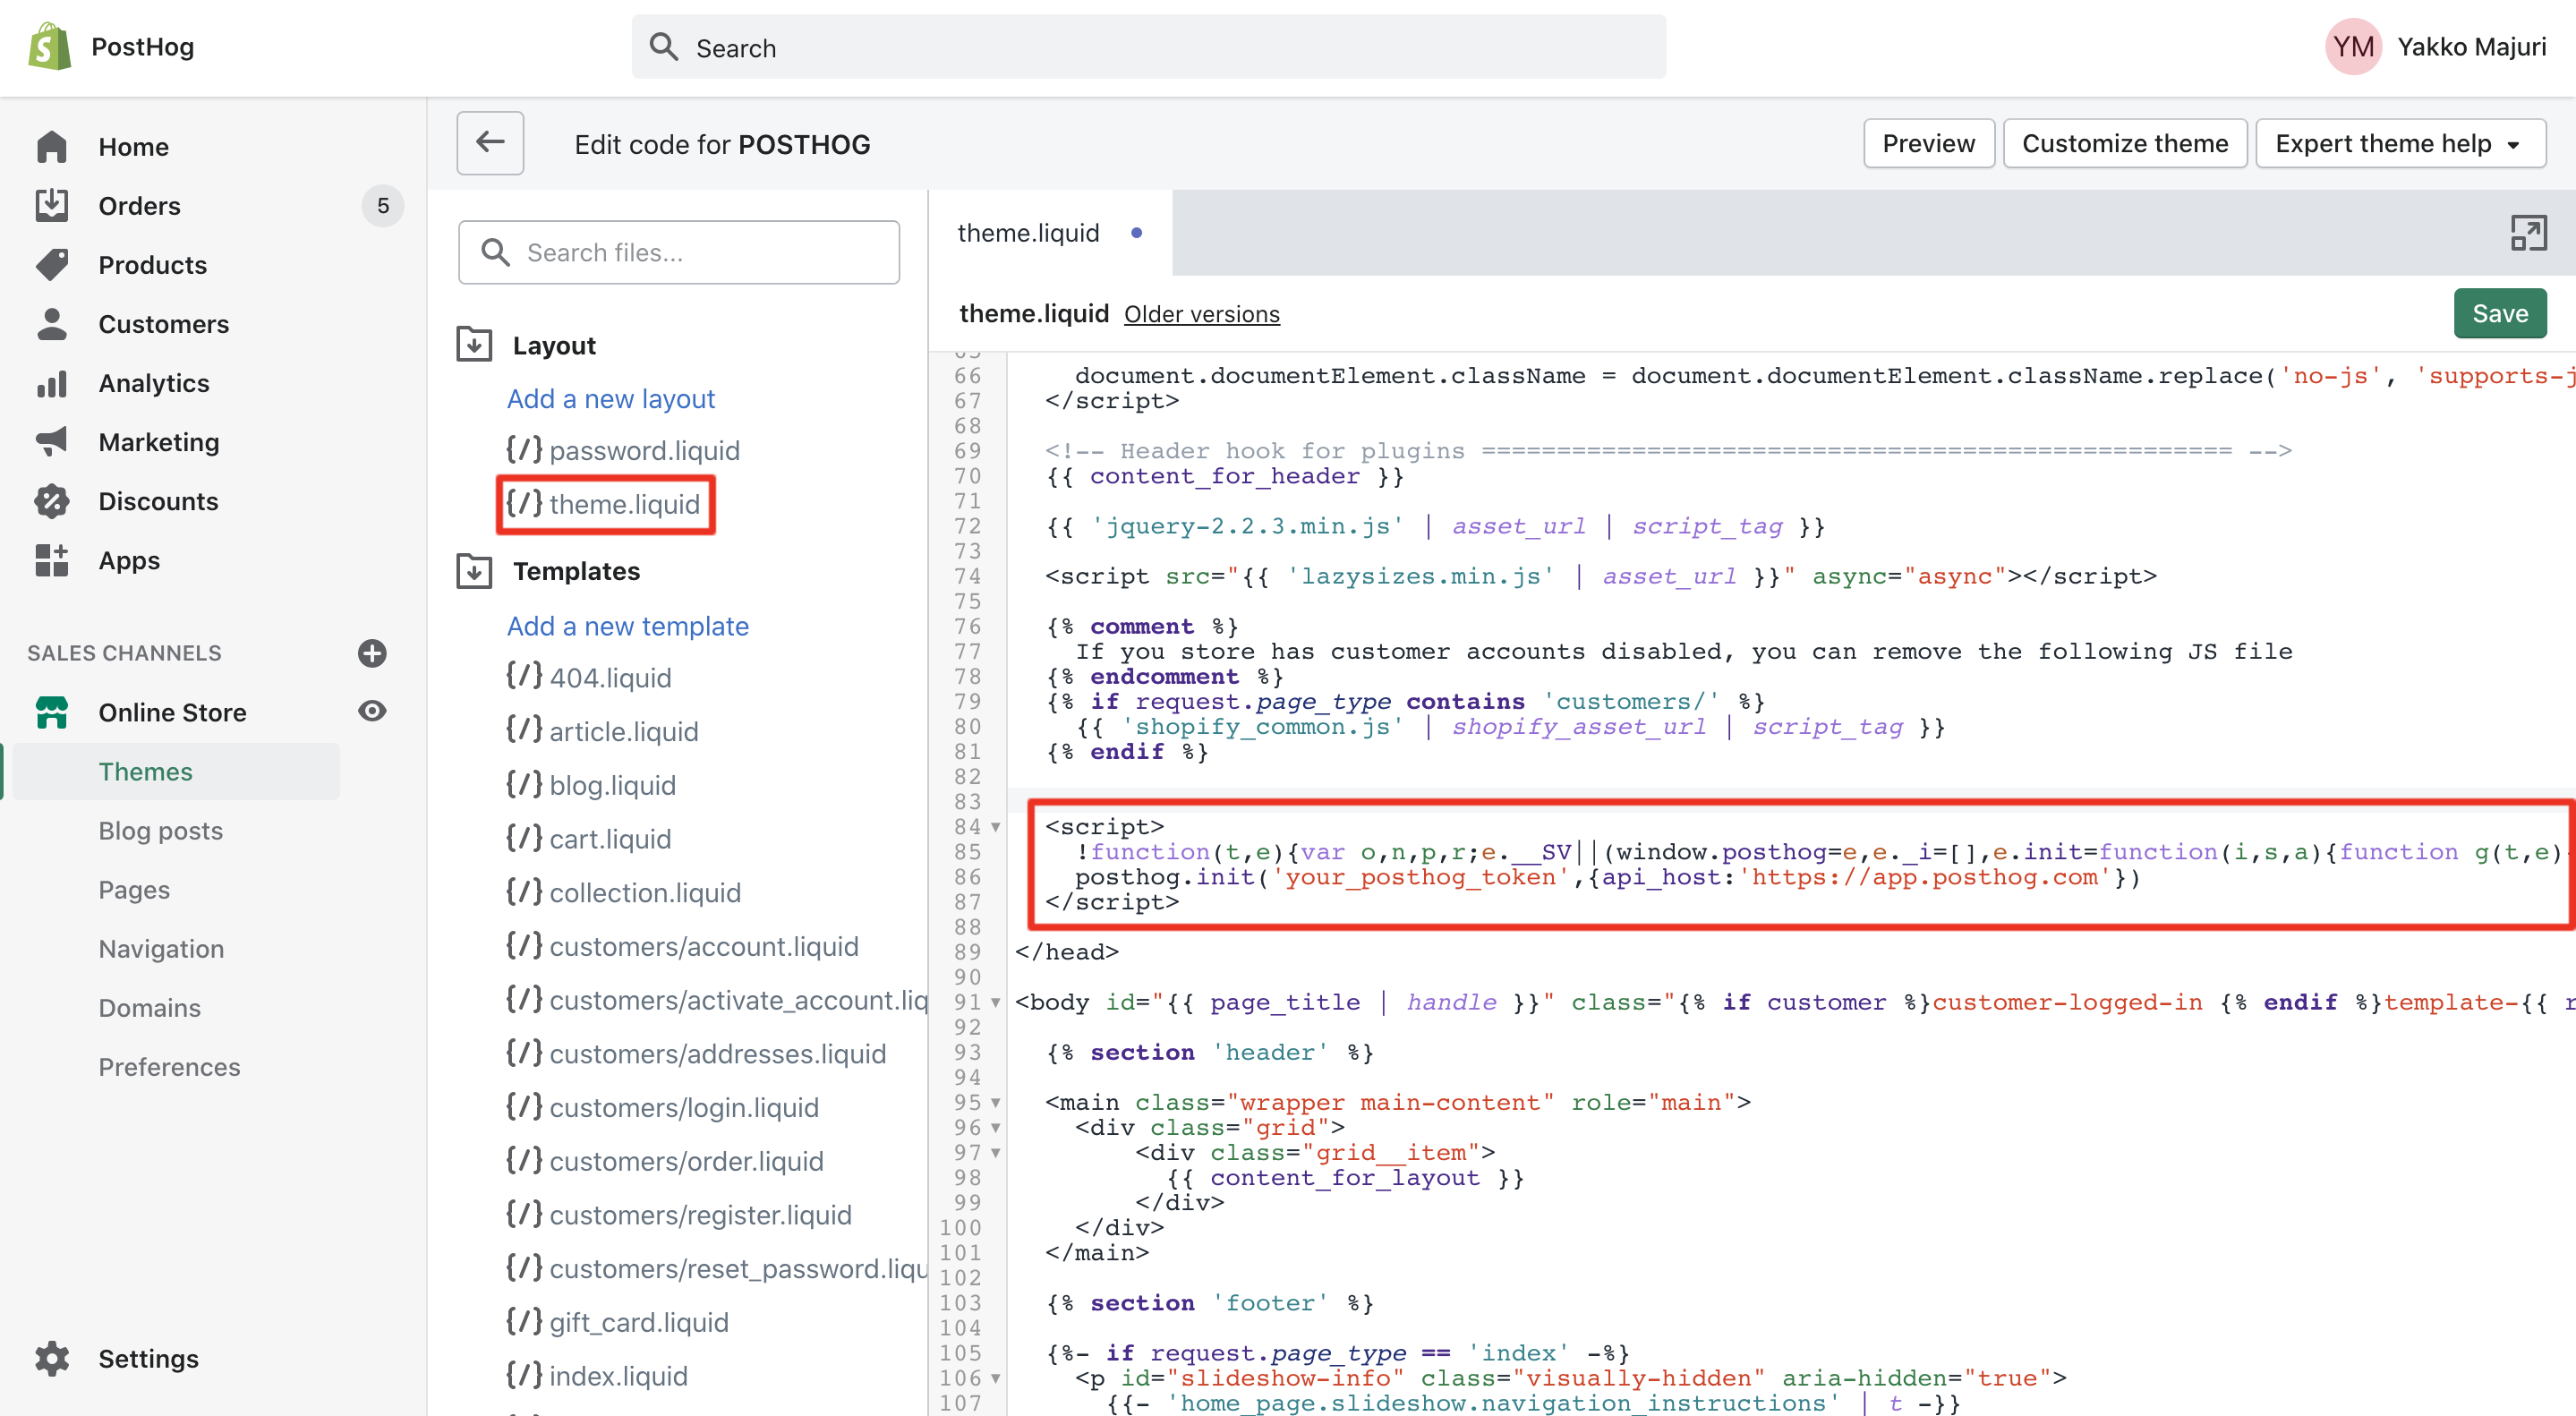
Click the green save button on the top right and you're good to go - PostHog should now be working on your Shopify store!
To confirm PostHog is configured correctly, visit your store and then check if the events from your session appear in PostHog. Note that this may take a few minutes.
Conversion tracking (advanced)
It can be useful to track additional events on your Shopify store, such as when a user adds an item to their cart or completes a purchase.
To do this, you can use autocapture to send metadata with events. This information can be used in further analysis in aggregate or when understanding behavior of an individual user.
The following requires some knowledge of HTML and Shopify's Liquid templating engine.
2. Add to cart (with data attributes)
To track which product a user adds to their cart, we can use a data-ph-capture-attribute on the 'Add to cart' button (generally in product.liquid in Shopify). While this still requires adding code, it's less involved than creating a custom event.
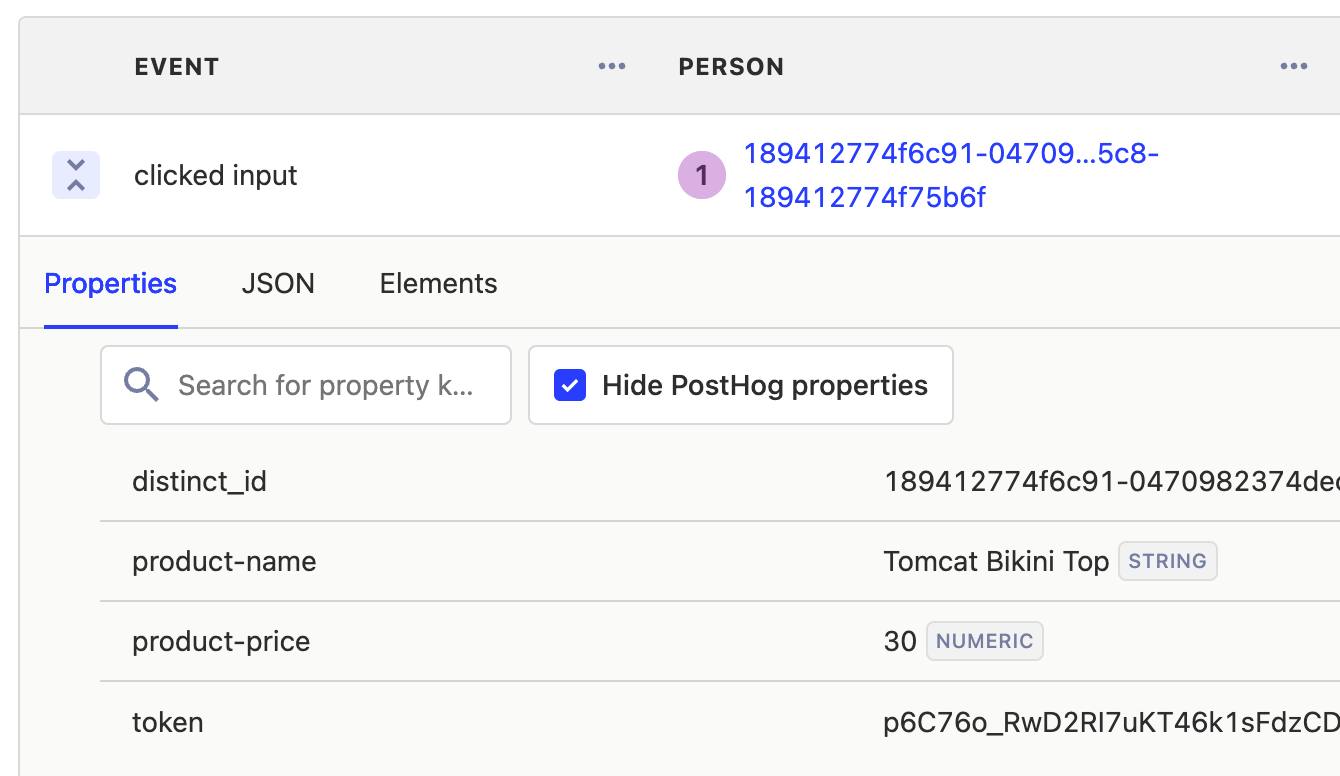
For example, capturing the product title and price (divided by 100) looks like this:
Once set up, the Add to cart button autocapture event in PostHog will include the properties for each of the attributes prefixed with data-ph-capture-attribute- and their values.
3. Order details (using properties on a custom event)
This requires a Shopify Plus account because you'll need to modify your store's checkout settings. This option is available in the Shopify admin by navigating to Settings → Checkout → Order status page → Additional scripts.
If you want to capture orders more accurately, you can do so using a custom event. These enable you to add properties for any of the fields in your order including price, order number, size, and currency.
To add a custom event to your Shopify checkout page, add a script like this to your checkout settings:
This code should be used as a guide and may need to be modified depending on the setup of your store.
Tip: Be sure to wrap the code in
{% if first_time_accessed %}to ensure the event is only sent once.
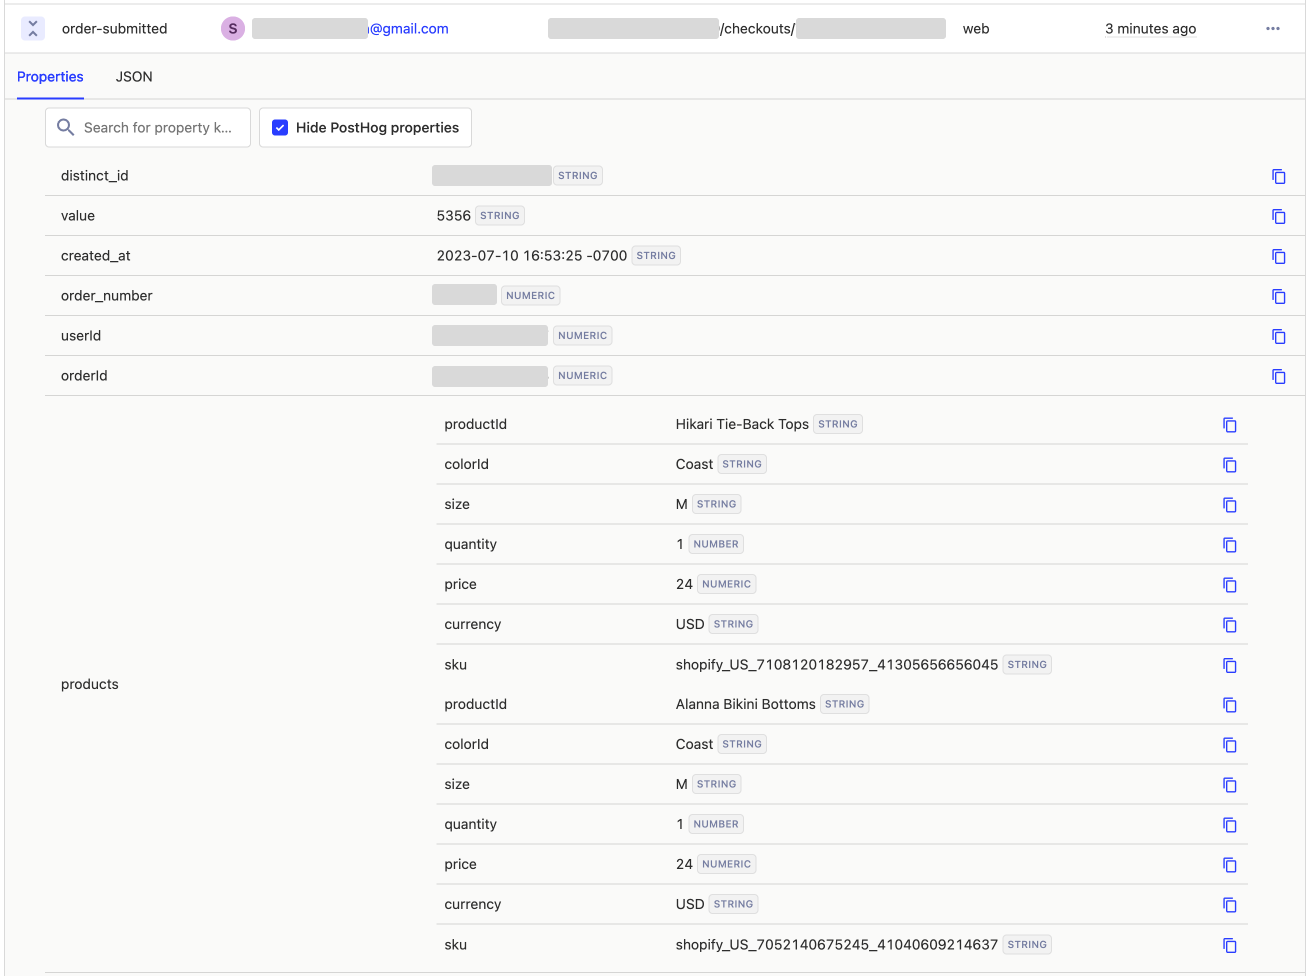
Once setup, you can see the order's total price including taxes (value) and the array of products that were ordered with specific info about the variants in PostHog:
What can you do with this data?
You can use this data to answer questions like:
- Which products are being left in the cart most often?
- Which products are being purchased together most often?
- Which marketing campaigns are driving sales of different products?
- How does regionality of shoppers affect the products they buy?